 **Segmenting Requests with Metadata**
While Creating the Client, you can pass any `{"key":"value"}` pairs inside the metadata header. Portkey segments the requests based on the metadata to give you granular insights.
```typescript icon="square-js" theme={"system"}
const client = createOpenAI({
baseURL: PORTKEY_GATEWAY_URL,
apiKey: "PORTKEY_API_KEY",
headers: createHeaders({
apiKey: "PORTKEY_API_KEY",
metadata: {
_user: 'john doe',
organization_name: 'acme',
custom_key: 'custom_value'
}
}),
})
```
Learn more about [tracing](https://portkey.ai/docs/product/observability/traces) and [feedback](https://portkey.ai/docs/product/observability/feedback).
## Guide: Handle OpenAI Failures
### 1. Solve 5xx, 4xx Errors
Portkey helps you automatically trigger a call to any other LLM/provider in case of primary failures.[Create](https://portkey.ai/docs/product/ai-gateway-streamline-llm-integrations/configs) a fallback logic with Portkey’s Gateway Config.
For example, for setting up a fallback from OpenAI to Anthropic, the Gateway Config would be:
```json Config theme={"system"}
{
"strategy": {"mode": "fallback"},
"targets": [
{"override_params": {"model": "@openai-prod/gpt-4o"}},
{"override_params": {"model": "@anthropic-prod/claude-3-opus-20240229"}}
]
}
```
You can save this Config in Portkey app and get an associated Config ID that you can pass while instantiating your LLM client:
### 2. Apply Config to the Route Handler
```typescript icon="square-js" theme={"system"}
const client = createOpenAI({
baseURL: PORTKEY_GATEWAY_URL,
apiKey: "PORTKEY_API_KEY",
headers: createHeaders({
apiKey: "PORTKEY_API_KEY",
config: "CONFIG_ID"
}),
})
```
### 3. Handle Rate Limit Errors
You can loadbalance your requests against multiple LLMs or accounts and prevent any one account from hitting rate limit thresholds.
For example, to route your requests between 1 OpenAI and 2 Azure OpenAI accounts:
```json Config theme={"system"}
{
"strategy": {"mode": "loadbalance"},
"targets": [
{"override_params": {"model": "@openai-prod/gpt-4o"}, "weight": 1},
{"override_params": {"model": "@azure-prod-1/gpt-4o"}, "weight": 1},
{"override_params": {"model": "@azure-prod-2/gpt-4o"}, "weight": 1}
]
}
```
Save this Config in the Portkey app and pass it while instantiating the LLM Client, just like we did above.
Portkey can also trigger [automatic retries](https://portkey.ai/docs/product/ai-gateway-streamline-llm-integrations/automatic-retries), set [request timeouts](https://portkey.ai/docs/product/ai-gateway-streamline-llm-integrations/request-timeouts), and more.
## Guide: Cache Semantically Similar Requests
Portkey can save LLM costs & reduce latencies 20x by storing responses for semantically similar queries and serving them from cache.
For Q\&A use cases, cache hit rates go as high as 50%. To enable semantic caching, just set the `cache` `mode` to `semantic` in your Gateway Config:
```json theme={"system"}
{
"cache": {"mode": "semantic"}
}
```
Same as above, you can save your cache Config in the Portkey app, and reference the Config ID while instantiating the LLM Client.
Moreover, you can set the `max-age` of the cache and force refresh a cache. See the [docs](https://portkey.ai/docs/product/ai-gateway-streamline-llm-integrations/cache-simple-and-semantic) for more information.
## Guide: Manage Prompts Separately
Storing prompt templates and instructions in code is messy. Using Portkey, you can create and manage all of your app’s prompts in a single place and directly hit our prompts API to get responses. Here’s more on [what Prompts on Portkey can do](https://portkey.ai/docs/product/prompt-library).
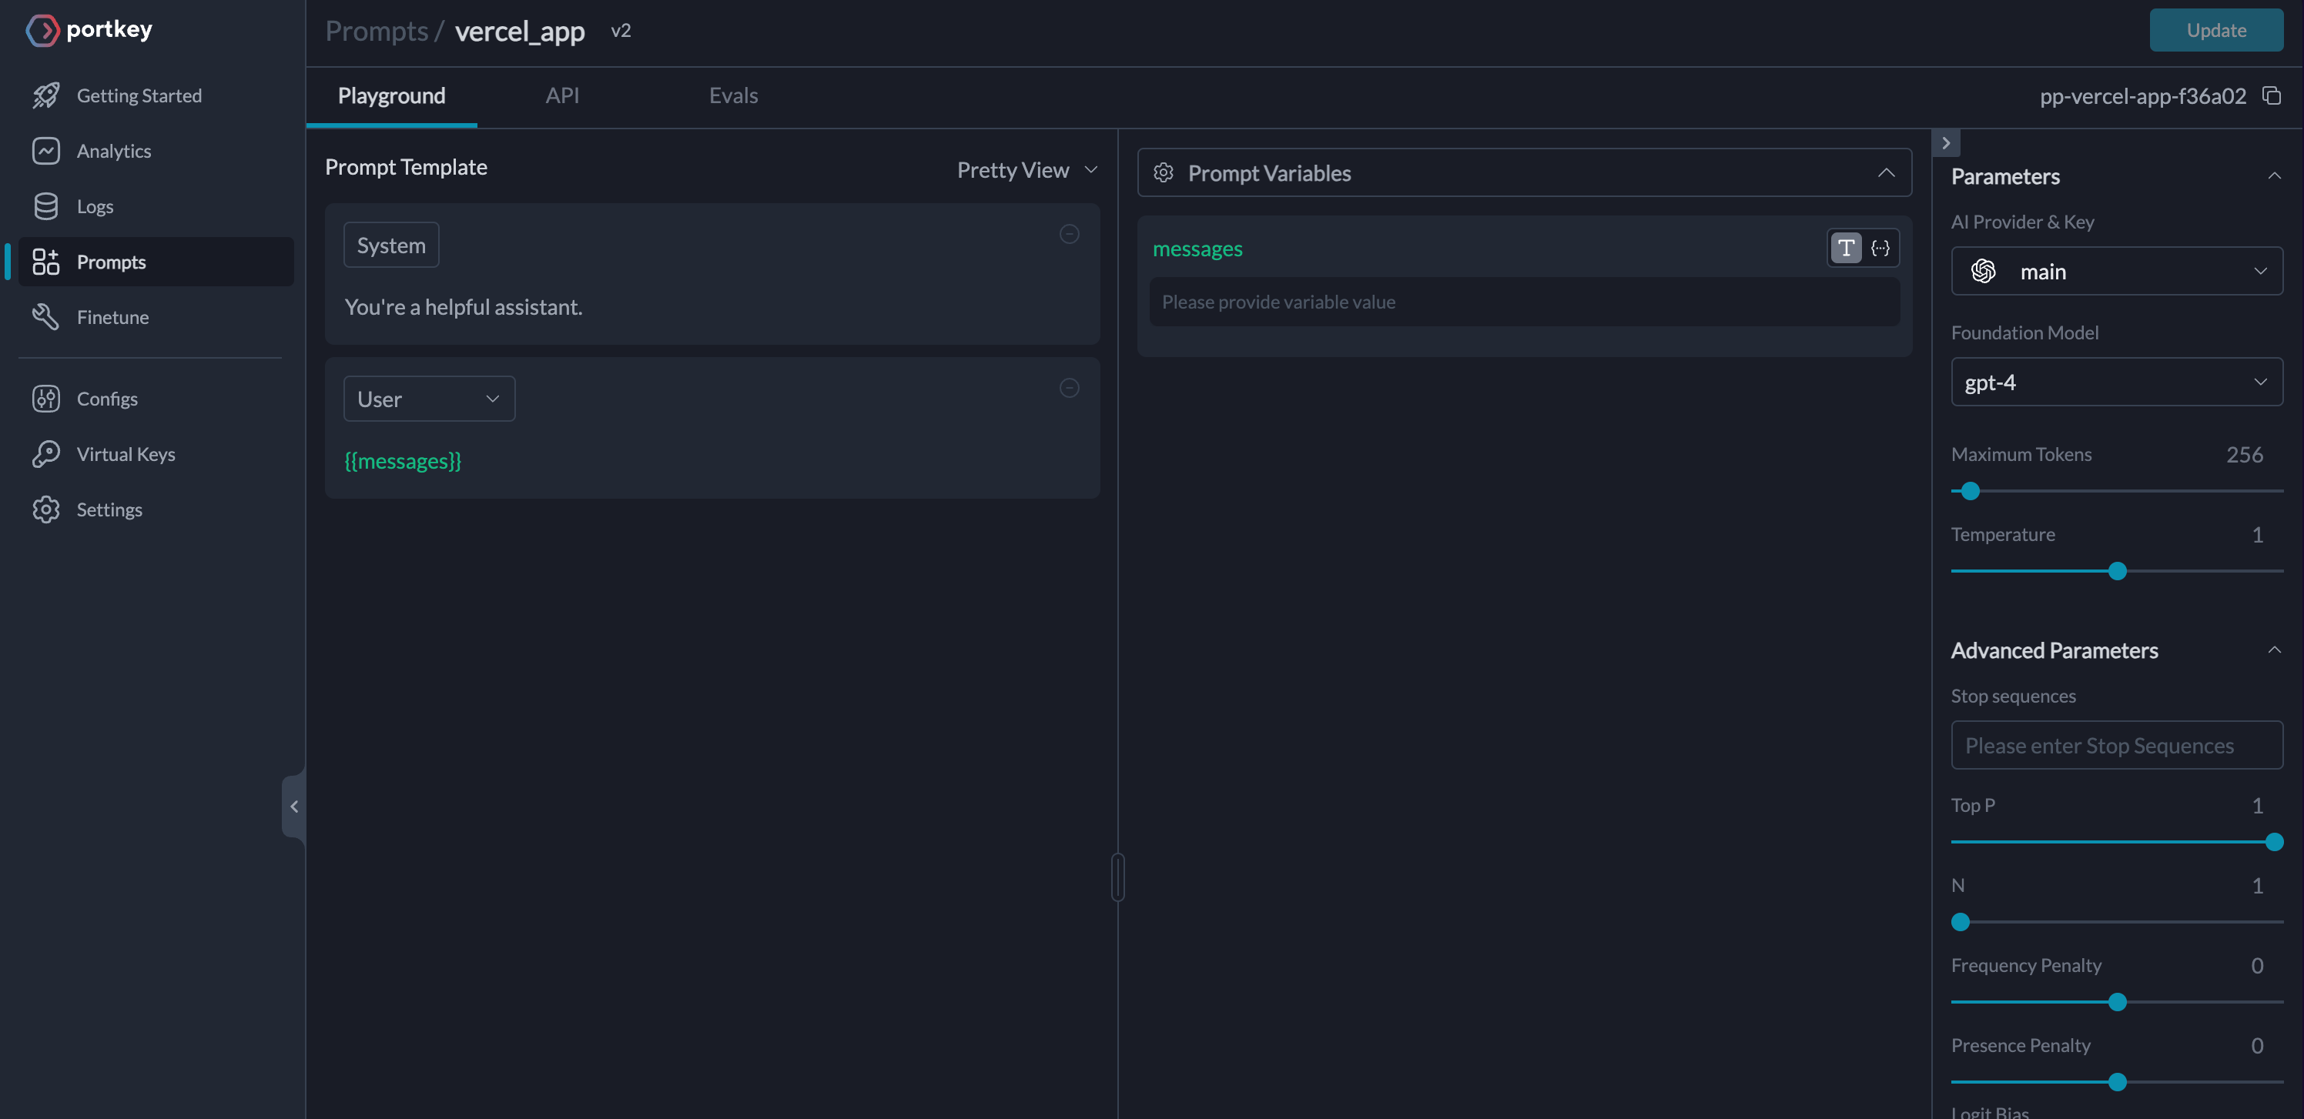
To create a Prompt Template,
1. From the Dashboard, Open **Prompts**
2. In the **Prompts** page, Click **Create**
3. Add your instructions, variables, and You can modify model parameters and click **Save**
**Segmenting Requests with Metadata**
While Creating the Client, you can pass any `{"key":"value"}` pairs inside the metadata header. Portkey segments the requests based on the metadata to give you granular insights.
```typescript icon="square-js" theme={"system"}
const client = createOpenAI({
baseURL: PORTKEY_GATEWAY_URL,
apiKey: "PORTKEY_API_KEY",
headers: createHeaders({
apiKey: "PORTKEY_API_KEY",
metadata: {
_user: 'john doe',
organization_name: 'acme',
custom_key: 'custom_value'
}
}),
})
```
Learn more about [tracing](https://portkey.ai/docs/product/observability/traces) and [feedback](https://portkey.ai/docs/product/observability/feedback).
## Guide: Handle OpenAI Failures
### 1. Solve 5xx, 4xx Errors
Portkey helps you automatically trigger a call to any other LLM/provider in case of primary failures.[Create](https://portkey.ai/docs/product/ai-gateway-streamline-llm-integrations/configs) a fallback logic with Portkey’s Gateway Config.
For example, for setting up a fallback from OpenAI to Anthropic, the Gateway Config would be:
```json Config theme={"system"}
{
"strategy": {"mode": "fallback"},
"targets": [
{"override_params": {"model": "@openai-prod/gpt-4o"}},
{"override_params": {"model": "@anthropic-prod/claude-3-opus-20240229"}}
]
}
```
You can save this Config in Portkey app and get an associated Config ID that you can pass while instantiating your LLM client:
### 2. Apply Config to the Route Handler
```typescript icon="square-js" theme={"system"}
const client = createOpenAI({
baseURL: PORTKEY_GATEWAY_URL,
apiKey: "PORTKEY_API_KEY",
headers: createHeaders({
apiKey: "PORTKEY_API_KEY",
config: "CONFIG_ID"
}),
})
```
### 3. Handle Rate Limit Errors
You can loadbalance your requests against multiple LLMs or accounts and prevent any one account from hitting rate limit thresholds.
For example, to route your requests between 1 OpenAI and 2 Azure OpenAI accounts:
```json Config theme={"system"}
{
"strategy": {"mode": "loadbalance"},
"targets": [
{"override_params": {"model": "@openai-prod/gpt-4o"}, "weight": 1},
{"override_params": {"model": "@azure-prod-1/gpt-4o"}, "weight": 1},
{"override_params": {"model": "@azure-prod-2/gpt-4o"}, "weight": 1}
]
}
```
Save this Config in the Portkey app and pass it while instantiating the LLM Client, just like we did above.
Portkey can also trigger [automatic retries](https://portkey.ai/docs/product/ai-gateway-streamline-llm-integrations/automatic-retries), set [request timeouts](https://portkey.ai/docs/product/ai-gateway-streamline-llm-integrations/request-timeouts), and more.
## Guide: Cache Semantically Similar Requests
Portkey can save LLM costs & reduce latencies 20x by storing responses for semantically similar queries and serving them from cache.
For Q\&A use cases, cache hit rates go as high as 50%. To enable semantic caching, just set the `cache` `mode` to `semantic` in your Gateway Config:
```json theme={"system"}
{
"cache": {"mode": "semantic"}
}
```
Same as above, you can save your cache Config in the Portkey app, and reference the Config ID while instantiating the LLM Client.
Moreover, you can set the `max-age` of the cache and force refresh a cache. See the [docs](https://portkey.ai/docs/product/ai-gateway-streamline-llm-integrations/cache-simple-and-semantic) for more information.
## Guide: Manage Prompts Separately
Storing prompt templates and instructions in code is messy. Using Portkey, you can create and manage all of your app’s prompts in a single place and directly hit our prompts API to get responses. Here’s more on [what Prompts on Portkey can do](https://portkey.ai/docs/product/prompt-library).
To create a Prompt Template,
1. From the Dashboard, Open **Prompts**
2. In the **Prompts** page, Click **Create**
3. Add your instructions, variables, and You can modify model parameters and click **Save**
 ### Trigger the Prompt in the Route Handler
```typescript JavaScript icon="square-js" theme={"system"}
import Portkey from 'portkey-ai'
const portkey = new Portkey({
apiKey: "PORTKEY_API_KEY"
})
export async function POST(req: Request) {
const { movie } = await req.json();
const moviePromptRender = await portkey.prompts.render({
promptID: "PROMPT_ID",
variables: { "movie": movie }
})
const messages = moviePromptRender.data.messages
const response = await streamText({
model: client('gemini-1.5-flash'),
messages
})
return response.toTextStreamResponse();
}
```
See [docs](https://portkey.ai/docs/api-reference/prompts/prompt-completion) for more information.
## Talk to the Developers
If you have any questions or issues, reach out to us on [Discord here](https://portkey.ai/community). On Discord, you will also meet many other practitioners who are putting their Vercel AI + Portkey app to production.
### Trigger the Prompt in the Route Handler
```typescript JavaScript icon="square-js" theme={"system"}
import Portkey from 'portkey-ai'
const portkey = new Portkey({
apiKey: "PORTKEY_API_KEY"
})
export async function POST(req: Request) {
const { movie } = await req.json();
const moviePromptRender = await portkey.prompts.render({
promptID: "PROMPT_ID",
variables: { "movie": movie }
})
const messages = moviePromptRender.data.messages
const response = await streamText({
model: client('gemini-1.5-flash'),
messages
})
return response.toTextStreamResponse();
}
```
See [docs](https://portkey.ai/docs/api-reference/prompts/prompt-completion) for more information.
## Talk to the Developers
If you have any questions or issues, reach out to us on [Discord here](https://portkey.ai/community). On Discord, you will also meet many other practitioners who are putting their Vercel AI + Portkey app to production.